
A home theater wall can look unfinished on the day the screen goes up. The panel is finally off the furniture, and yet something reads as unresolved: the display floats too far from the plaster, the hardware shows past the bezel at one corner, or the picture sits a little off centre against the shelving. None of that is a decorating problem. It is the result of mount decisions taken in the wrong order, where appearance was assumed to follow from the product and not from the measurements. A mount that suits the display and the wall can be made to disappear; one that does not can stay visible from ordinary seating positions. This article works through what a clean installation actually depends on, the display and wall facts that have to be settled first, the movement a room genuinely needs, the specifications that decide how flush a screen sits, and how to shortlist product forms once those are known.
What a clean install actually depends on
The word clean covers several unrelated properties, and a product that delivers one can be indifferent to the rest. Separating them early is what turns a vague preference for a tidy wall into a specification a product page can be checked against.
Three visual properties do most of the work.
How far the panel stands off the wall. This is one of the properties a stated preference for clean can refer to, and it is easier to judge from a photograph than from a figure. Standoff is set by the mount’s retracted geometry combined with the depth of the display’s own rear profile, so two screens on the same mount will not sit at the same apparent distance from the wall. It is also the property that competes most directly with motion, since whatever tilt and swivel a mount offers is housed somewhere behind the panel.
Whether hardware reads at the edges. A mount is invisible when the wall-side bracket, the arms and the fixings all fall inside the outline of the panel from every normal viewing angle. Whether that happens depends on the bracket’s footprint relative to the display’s width and height, and on where the display’s mounting bosses sit within the chassis. A large panel with a narrow bezel can be less forgiving here, because there may be little chassis left to hide anything behind.
Whether the screen sits where the room expects it. A perfectly flush panel still looks wrong if it is a few centimetres off the centre line of the wall, the media unit or the seating. This is partly a planning question and partly a product question, because the amount a screen can be shifted after the bracket is fixed varies considerably between mounts.
These three fail in different ways. Standoff is a purchase decision that cannot be corrected later. Hardware visibility is a compatibility question between two specific products. Placement is recoverable only to the extent the mount was designed to allow it. The sections below take them in the order the decision actually needs.
Establish the display and the wall before appearance enters the discussion
Screen diagonal is a room-planning figure, not a selection figure. Two installations described identically as a large screen on a flat wall can need different products, because panels of the same diagonal differ in mass, in rear depth, in where their mounting bosses sit and in how their chassis is shaped behind the bezel. The facts below are what make any comparison meaningful, and none of them are about appearance yet.
The display: model number, weight without stand, VESA pattern and rear profile
Start with the exact model number from the label on the back of the chassis or from the display manufacturer’s own specification page. Everything else follows from it.
Weight without the stand is the figure a mount’s rated load is meant to be read against. Retail listings and packaging frequently quote a weight that includes the pedestal, and where that is the case the number is not directly comparable to a mount rating. Check which weight each document is describing before treating any headline figure as a match.
The VESA hole pattern should be measured in millimetres, horizontally and vertically, rather than inferred from screen size. Confirm it against the display manufacturer’s documentation for that exact model, then against a candidate mount’s published supported range rather than against a general expectation for the size class.
The rear profile is the fact most directly tied to a flush appearance, and it is easy to overlook. Panels vary in whether the mounting bosses sit flush with the back surface, in a recess, or on a raised or stepped section, and some large displays are considerably deeper across the lower half of the chassis than across the top. A recessed boss can pull a screen closer to the wall than the mount’s own figure suggests; a protruding one, or a curved rear, can push it further out and may call for spacers. Photograph the back of the panel and note where the surface changes depth before assuming a low profile product will read as low profile on that display.
The wall: what the surface is built from and where fixings can land
A mount can only be assessed against the structure it is fixed to. Establish what the wall is built from across the whole area the bracket will cover rather than at a single point, since a wall that appears uniform from the finished surface can combine masonry, boarded framing, a service void or a decorative facing across the same face.
Two consequences follow for a clean result specifically. First, the structural fixing positions available may not fall where the screen needs to be centred for the room, which is a constraint that has to surface before a product is ordered rather than during installation. Second, the wider the wall-side bracket, the more likely it is to reach usable fixing positions, but the more likely it also is to extend past the outline of a smaller panel. Bracket width is therefore both a fixing question and an appearance question at the same time.
The document that governs this is the installation instruction sheet supplied with the specific mount under consideration, which names the substrates that product has been prepared for and the fixings intended for each. No article, this one included, can substitute for it. Where the construction cannot be identified with confidence, that uncertainty should be resolved before a purchase rather than after.
Decide how much movement the room genuinely needs
Motion is the main thing a clean install trades away, so it is worth deciding deliberately rather than defaulting to the most capable product on the shortlist. A mechanism that lets a screen move is accommodated behind the panel when it is not moving, and that volume is the volume a flush appearance is trying to eliminate. The useful question is not how much movement is available but which movement has a named job in this room.
When a fixed form is the cleanest answer
The trigger is a wall that already faces the seating, at a height the room permits, with a display whose rear connections are either reachable or unlikely to change. Where all three hold, a fixed form removes the mechanism from behind the panel, and how close the screen then sits still depends on the display’s own rear depth and on the retracted depth that model publishes.
The cost is that nothing is adjustable afterwards in the way an articulating product allows, so the measurements taken before fixing carry more weight. The evidence that resolves this is simple: sit in each seat and check the height and the angle from there, rather than judging the wall while standing in front of it. Eye level from a sofa is considerably lower than eye level from a standing position, and a screen positioned by eye while standing can end up too high once a fixed mount leaves no way to correct it.
When tilt is the minimum viable movement
The trigger is a screen that has to sit above a seated eye line, which happens whenever furniture, a wall feature or the room layout sets the height before the mount is chosen. Without downward angle the panel is being viewed off axis every time it is on.
Tilt range is then the controlling specification, and it should be read from the exact model’s product page rather than assumed from the category, since ranges vary between models and some sheets combine forward and backward travel into a single total. Two consequences matter for appearance. Tilting a panel forward increases the depth its lower edge stands off the wall, so the flush look is partly surrendered whenever the tilt is in use. And a tilt mechanism adds thickness behind the panel even at rest, so a tilt product and a fixed product from the same brand may not share a retracted depth. Compare the two figures as each model publishes them.
When full motion is worth its bulk
The trigger is a named task that careful placement alone does not address: seating positions on more than one axis, a wall that does not face the room square on, or rear connections that cannot be reached with the screen against the wall. Where one of those applies, an articulating arm is doing real work and its volume is a fair trade.
The consequences are worth stating plainly. A folded arm still occupies space behind the panel, so the retracted depth published for that model, rather than its maximum extension, is the figure to compare against a fixed or tilt candidate. A longer arm also applies more leverage at the wall-side bracket, which raises the importance of the substrate and the specified fixings rather than changing the mount alone. And the extended screen has to have somewhere to go, so the swept arc needs checking against side walls, doorway reveals, shelving and lighting before a reach figure is treated as usable in that room.
Where the flush look matters and some articulation is genuinely required, low profile full motion forms exist precisely for that conflict, and retracted depth becomes the comparison figure alongside reach.
The specifications that decide how flush a screen sits
Once the required movement is settled, a small number of published figures do most of the work of separating candidate products. They are also figures that manufacturers do not always quote to the same convention, which is why a shortlist has to be normalised before it can be compared.
Retracted depth, and where it is measured from
This is a central figure for a clean install, and one that is easy to misread. Some sheets describe the thickness of the mount assembly alone, and some describe the distance from the wall surface to the back of a mounted display. Those are not the same number and cannot be compared across brands without checking which convention each one uses.
What actually determines the visible gap is that figure combined with the rear profile of the specific display. A mount quoting a very low profile can still leave a visible gap under a panel whose lower chassis is deep, and a slightly thicker mount can disappear behind a display with a recessed mounting area. Read the mount figure and the display’s rear geometry together, in that order, rather than treating either as the answer on its own.
Bracket footprint against the panel outline
The wall-side bracket needs to be wide enough to reach structural fixing positions and narrow enough to stay behind the display. Those two requirements pull in opposite directions, and on smaller panels they can conflict outright.
Check the published dimensions of the wall-side bracket against the display’s width and height, and check where the display’s mounting bosses fall within the chassis, since a panel whose bosses sit high will hang lower relative to the bracket than one whose bosses are centred. Where a product publishes both a bracket dimension and a supported size range, the smallest screen in that range is the case worth checking, not the largest.
Adjustment after the bracket is fixed
No wall is perfectly plumb and no fixing lands exactly where it was drawn, so the adjustment a mount provides after fixing is what converts a good measurement into a level screen. Three kinds are worth looking for on a product page.
- Post-installation levelling. A small amount of roll correction, which is what removes the visible tilt that a marginally off-level bracket would otherwise leave in the picture.
- Lateral shift. The ability to slide the panel sideways after the bracket is fixed, which is what allows the screen to be centred on the room when the fixing positions are centred on the structure instead.
- Height and depth trim. Small vertical or standoff adjustment at the display interface, useful where the rear profile turned out deeper than expected.
Whether a given model offers any of these has to be confirmed from that model’s own documentation. It is not a category property, and it is the difference between a screen that can be brought onto the room’s centre line and one that is committed to wherever the structure allowed the bracket to go.
Placement decisions that read as tidiness
Two installations using the same product can look entirely different, and the difference between them can come from placement rather than hardware. These decisions cost nothing except being made before the bracket is fixed.
- Set height from seated eye level. Measure eye height from the actual seating and the horizontal distance to the wall, then derive the screen centre height from those. A height chosen while standing can read as too high once the room is being viewed from the seating.
- Pick one centre line and commit to it. The wall, the media unit and the main seating position may not share a centre. Decide which one the eye will read as the reference and align the screen to that, rather than splitting the difference between all three.
- Check the outline against the room’s existing lines. Shelving edges, a chimney breast, a window reveal or a picture rail all give the eye something to compare the panel against. A screen a little out of parallel with a strong nearby line can draw the eye more than one sitting further from centre.
- Account for what sits below the screen. Anything projecting from the wall underneath the panel affects both the usable tilt and the perceived gap, so measure its projection before deciding how much forward angle the room can actually use.
Product forms worth shortlisting, and where ThunderTech fits
Once the display, the wall, the required movement and the placement are established, the category resolves into a small number of forms rather than a single best product. Reading them as forms first makes brand comparison much faster, because it narrows what has to be checked on each candidate product page.
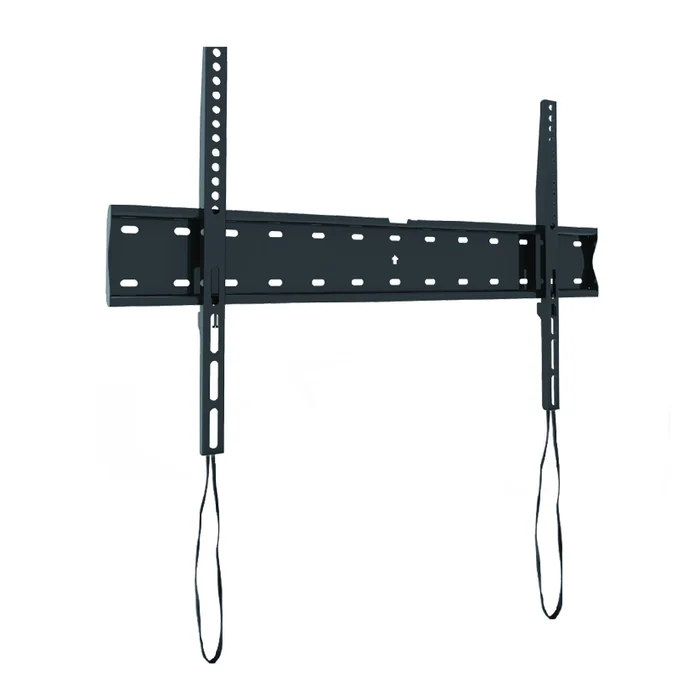
- Fixed mounts. No mechanism behind the panel and no adjustment once installed, with the resulting standoff set by the model’s published retracted depth and the display’s rear profile. Suitable where height and viewing angle are already right and rear access is not a recurring need.
- Tilt mounts. The minimum addition for an elevated screen. They provide downward angle, with the retracted depth each model publishes as the figure to weigh against a fixed candidate.
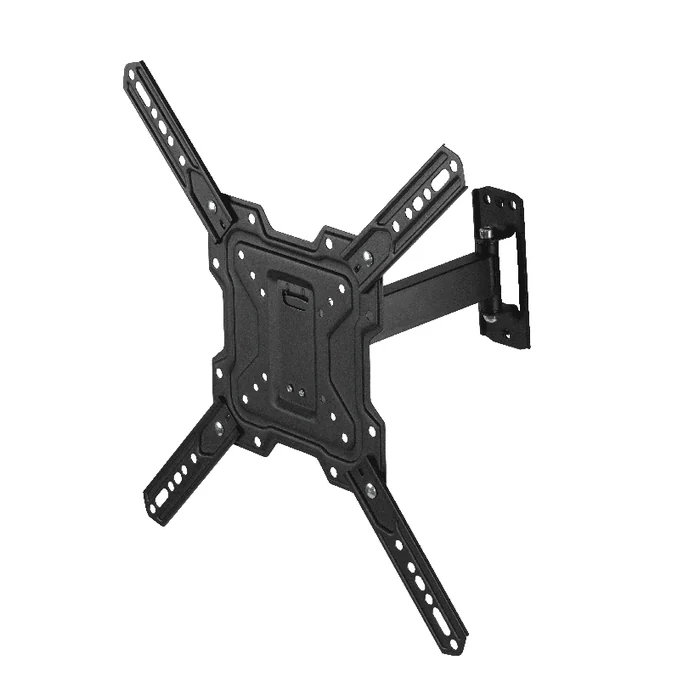
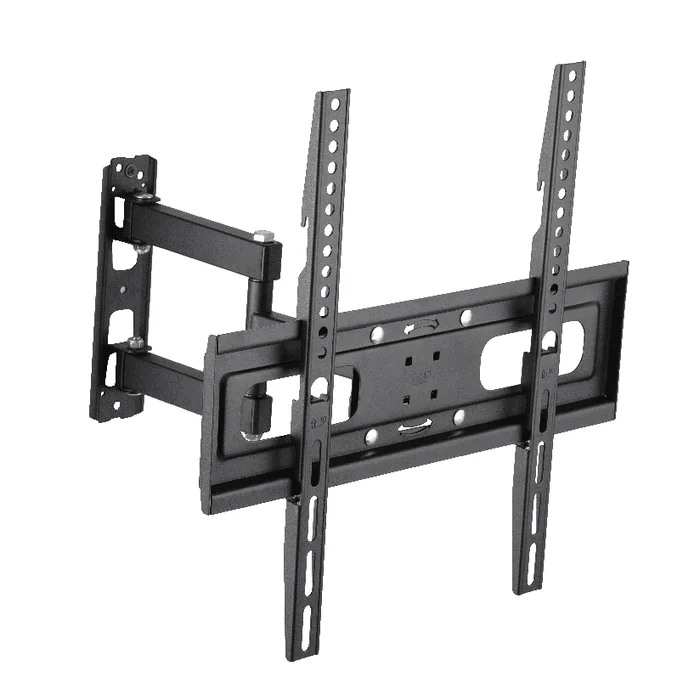
- Full motion mounts. Tilt, swivel and extension together, for rooms where the seating or the wall orientation genuinely demands it. Retracted depth and swept arc both become part of the appearance decision.
- Low profile full motion forms. For the specific conflict between a flush look and a real need for articulation, where retracted depth is compared alongside reach.
Sanus, Vogel’s, Chief, Kanto and Echogear all publish products across these forms, and a shortlist may span several manufacturers. The comparison only works if the figures are rewritten into one convention first. Retracted depth may be quoted as assembly thickness or as wall to display distance, extension may be measured from the wall face or from the mounting interface, swivel may be a total across both directions or an angle per side, and tilt ranges are sometimes forward only and sometimes combined. Take each figure from that model’s own published specification rather than from a marketplace listing or an editorial roundup, including this one.
ThunderTech is an AV mounting manufacturer and publishes fixed, tilt and full motion TV wall mount forms, alongside monitor arms, in its official product range. That page is the right starting point for matching a form to the requirement developed above. It is not a substitute for the model level check: rated load against the display weight without its stand, supported VESA range against the measured pattern, retracted depth and motion ranges against the geometry the room allows, published bracket dimensions against the panel outline, and the specified fixings against the substrate identified on the wall. Those figures belong to the individual model’s product page and installation instructions, and should be confirmed there before an installation depends on them.
Specifying the category as a retail or OEM buyer
Buyers specifying mounts for resale rather than for one room are answering a related but different question: whether a manufacturer’s published scope covers the product they intend to sell, and whether the envelope they have in mind is internally coherent. A low profile product line makes that coherence question sharper than usual, because retracted depth constrains almost every other decision in the design.
The inputs worth sending with a first enquiry are these.
- Target screen envelope. The size band the product is meant to cover and, more importantly, the weight range without stands, since that is what a load rating is defined against.
- VESA and rated load range. The pattern range the product needs to support and the load band it is intended to be rated for, expressed as ranges rather than single points.
- Retracted depth priority. Whether a flush profile is the governing requirement for the intended shelf story, and how much motion may be traded for it.
- Motion range. Which of tilt, swivel and extension are required, and the priority between them where they conflict.
- Adjustment expectations. Whether post-installation levelling and lateral shift are expected in the product, since these are design decisions rather than accessories.
- Bracket footprint constraints. Any limit on wall-side bracket dimensions implied by the smallest screen in the intended range.
- Packaging, instruction and branding requirements. Retail or ecommerce packaging format, instruction languages, artwork ownership and hardware presentation expectations.
- Market documentation. The documentation the destination market expects for this product category, established for that market rather than assumed from another.
With that envelope defined, ThunderTech’s published factory process information and company overview are useful for a scope check, meaning whether the described processes and product categories cover the product under discussion. Anything beyond published scope, including tooling routes, capacity, certification coverage, testing, lead time and finished performance, is a project confirmation item to establish in writing for the specific programme rather than something to read off a website.
A working sequence before ordering
Run these in order. Each step closes a failure mode the later steps cannot recover from, and the ordering matters more than the individual items.
- Record the display model number, the weight without its stand, and the VESA pattern measured in millimetres.
- Photograph the rear of the panel and note where the chassis changes depth, and whether the mounting bosses are flush, recessed or raised.
- Identify what the wall is built from across the full area the bracket will cover, and locate the structural fixing positions available there.
- Measure seated eye height and viewing distance, and derive the screen centre height the room needs.
- Name the task, if any, that requires movement. If there is none, a fixed form is worth comparing first, on its published retracted depth.
- Decide which centre line the screen will be aligned to, and check whether the available fixing positions allow it without relying on lateral adjustment.
- Normalise the shortlist: rewrite retracted depth, tilt, swivel and extension for every candidate into one measurement convention before comparing them.
- Check the wall-side bracket dimensions against the panel outline, and confirm what adjustment the model provides after fixing.
- Read the chosen model’s installation instructions and confirm the specified fixings match the substrate identified in step three, before ordering anything.
Questions worth resolving before choosing a mount for a home theater wall
Which mount type gives the flushest look on a home theater wall?
A fixed form has no mechanism to house behind the panel, while tilt and full motion forms do, so the retracted depth each model publishes is what settles the comparison for a given display. The right question is which movement has a named job in the room, since motion that never gets used still occupies the space a flush look needs. ThunderTech publishes fixed, tilt and full motion wall mount forms in its product range as a starting point for identifying the form.
Does a low profile mount guarantee the screen will sit close to the wall?
No, because the visible gap is set by the mount and the display together. A panel with a deep lower chassis or raised mounting bosses can stand further out than the mount’s own figure suggests, while a recessed mounting area can pull it closer. Check the mount’s retracted depth figure and the display’s rear geometry together before predicting the result.
Why do retracted depth figures differ so much between brands?
Because manufacturers do not all measure the same thing. Some publish the thickness of the mount assembly, and some publish the distance from the wall surface to the back of a mounted display. Rewrite every candidate’s figure into one convention of your own before comparing, taking each number from that model’s published specification rather than from a listing.
How do I stop the mounting hardware from showing at the edges of the screen?
Compare the published dimensions of the wall-side bracket against the width and height of the specific display, and note where the display’s mounting bosses sit within the chassis. Where a product covers a wide size range, check the smallest screen in that range rather than the largest, since that is the case where the bracket has the least panel to stay behind. A narrow bezel design can leave less chassis to conceal hardware behind.
What decides the right height for a wall-mounted screen?
Seated eye height and viewing distance, measured from the actual seating rather than judged while standing. Derive the screen centre height from those two figures, then check whether the wall’s available fixing positions allow it. Where the height has to be higher than the seated eye line for other reasons, downward angle becomes a requirement and tilt range becomes the controlling specification.
Can the screen still be centred if the fixings do not land on the centre line?
Sometimes, and it depends entirely on whether the model provides lateral adjustment after the bracket is fixed. This is a model level feature rather than a category property, so confirm it from the product’s own documentation before assuming it. Where no lateral shift is available, the fixing positions decide the screen position, which is a reason to establish them before ordering.
Is screen size enough to choose a mount?
No. Panels of the same diagonal vary in mass, rear depth and mounting pattern, so diagonal alone can produce a mismatch. The figures that decide compatibility are the weight without stand and the VESA hole spacing in millimetres, both taken from the display manufacturer’s specification for the exact model number. Compare those against a specific mount’s published rated load and supported VESA range.
How should a shortlist across several brands be compared fairly?
Normalise the figures first, then compare. Extension may be quoted from the wall face or the mounting interface, swivel may be a total across both directions or an angle per side, and tilt is sometimes forward only and sometimes combined. Once every candidate is expressed the same way, the remaining differences are real ones rather than artefacts of how each sheet was written.