
One screen on a riser is easy. The moment you add a second panel, the math changes: you need more top-surface width, more weight headroom, and a plan for how the two screens sit relative to each other. A dual monitor standing desk converter is not just a single-screen riser with a bigger sticker price. It has to hold two displays side by side without overhanging your desk, lift the combined load without sagging, and stay planted when you raise it to standing height. This guide covers what actually differs with two screens, so you buy a unit that fits both monitors the first time.
What changes the instant you add a second monitor
A single-monitor riser only has to clear one panel and a keyboard. Two screens push on three numbers that a one-monitor buyer never thinks about.
First, top-surface width. Two 24-inch monitors sitting on their factory stands need roughly 42 to 46 inches of side-to-side room, and 27-inch panels need more. A 28-inch deck that handles one screen will leave a second monitor hanging off the edge.
Second, total weight. You are no longer lifting one panel. You are lifting two screens plus either two stands or a dual monitor arm, which can climb past 30 lbs before you add the keyboard. A riser rated for a single laptop will bounce, creep, or refuse to stay raised.
Third, balance. A riser loaded heavily on one side wants to tip when it travels up. Two screens centered over the lift mechanism stay stable. Two screens shoved to one corner do not. This is the failure mode people never anticipate until the platform wobbles at full height.
The layouts you can run on a two-screen riser
How you mount the panels decides the width and weight you need. There are three common approaches, and they are not equal.
- Two monitors on their factory stands, resting on the deck. Simplest and cheapest, no extra hardware. The cost is desk space: the stands eat the deck, and you lose height adjustment per screen. You need the widest possible top surface for this.
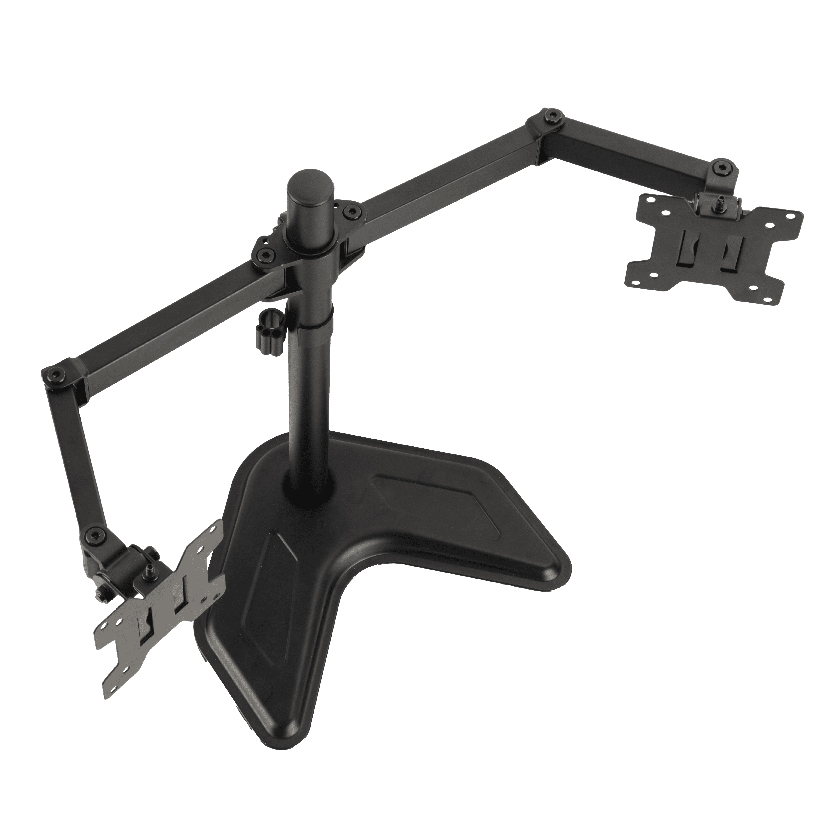
- A dual VESA monitor arm clamped to the riser. One mount, two screens floating above the deck. This is the cleanest layout for a dual monitor standing desk converter with arm support, since it frees the surface and lets you angle each panel. It needs a riser with a clamp edge or a built-in mount point.
- Two single monitor arms. Maximum independent adjustment, each screen on its own arm. It demands two clamp points and more weight capacity, and it costs more than a single dual arm. Best when your two screens are different sizes or you want very different angles.
For most home offices, a dual VESA arm hits the sweet spot. It centers the load, keeps the deck clear for the keyboard, and lifts both panels to eye level. Two single arms suit mismatched screens; bare stands suit the tightest budgets.
How to size your riser for two screens correctly
This is the step that prevents a return. Before ordering a wide dual monitor standing desk converter, work through these checks in order.
- Add up your two monitors’ widths. Measure each panel edge to edge, add them, then add 2 to 4 inches for the gap between them. The deck has to be at least that wide. Most genuine dual decks run 42 inches or more across the top.
- Weigh both screens plus the mount. Look up each monitor’s weight, double-check if they differ, and add the arm or stands. Match that total against the riser’s rating with margin to spare, not right at the limit.
- Confirm the mount surface. If you want a dual VESA arm or two single arms, the riser needs an exposed rear lip or a built-in mount point thick enough for the clamp. A deck with a raised back wall blocks many clamps.
- Check the lift height against your elbows. Stand with elbows at 90 degrees and note that height. The riser’s top travel has to put your keyboard there, which for taller users means confirming the maximum lift, not the minimum.
- Plan the gap and bezel position. Decide whether you will look straight at one screen (primary plus secondary layout) or split your gaze across the seam (symmetric layout). The arm or stand spacing has to allow either, with the bezels meeting cleanly so the gap stays narrow.
Do all five and a clean fit is almost certain. Skip the width or weight check and you are gambling on a return trip.
How the two-screen mounting options compare
Choosing a layout for a dual monitor sit stand converter comes down to a few measurable factors. The table lines up the three approaches on the points that drive the decision. “Typical added cost” is the rough US street range for the mounting hardware on top of the riser itself.
| Mounting approach | Typical added cost | Frees the deck surface | Independent screen angles | Lowest weight load |
|---|---|---|---|---|
| Two factory stands on the deck | $0 | No | No | No |
| Dual VESA arm (one clamp) | $40 to $120 | Yes | Yes | Yes |
| Two single monitor arms | $80 to $220 | Yes | Yes | No |
The pattern is straightforward. Bare stands cost nothing but consume the most surface and offer the least adjustment. A single dual arm frees the deck and centers the load for moderate money, which is why it is the common pick for the best dual monitor standing desk converter setups. Two single arms give the most freedom and the most flexibility for mismatched screens, at the highest cost and the heaviest total load on the riser.
Keeping the riser stable and the cables tidy with two screens
Two monitors raise two practical worries that a single screen never does. Both have simple fixes.
Balance. Center the combined weight of the two panels over the lift mechanism, not off to one side. If you run a primary plus a smaller secondary screen, position the heavier panel closer to the middle of the riser and let the lighter one sit toward the edge. A dual VESA arm with a central mount post handles this automatically, which is one more reason it stays stable at full standing height.
Cables. Two screens mean two video cables, two power leads, and often a USB hub. On a riser that moves up and down, slack matters: cables that are taut when seated will pull tight (or unplug) when you stand. Route them with a service loop, clip them to the rear of the deck or up the arm post, and confirm they reach through the full travel before you commit. A clamp-on arm with a built-in channel keeps both screens’ cables off the deck entirely.
Where ThunderTech Pros fits in a two-screen sit-stand setup
ThunderTech Pros manufactures its mounting hardware in its own ISO 9001:2015 certified factories, with 17 years of production experience across TV mounts, monitor arms, and AV mounting solutions. That production background matters more with two screens than with one, because the combined load and the off-center forces on a raised platform are exactly where loose tolerances show up as creep or wobble.
For a home office worker who wants both panels floating above the deck instead of crowding it, pairing a wide riser with a dual VESA arm such as the ThunderTech Pros DA-2 (mechanical dual arm, fits panels up to 32 inches, 8 kg per arm) centers the load over the lift and puts each screen at eye level while the keyboard surface stays clear. The brand also carries TUV and UL certification and supplies through Walmart, Costco, Amazon, and Lowe’s, so the hardware meets retail safety review rather than competing on price alone. You can browse the current monitor arm and standing desk lineup on the ThunderTech Pros product range before you match an arm to your riser.
To be fair, ThunderTech Pros is one option among several. Ergotron sets the reference standard for gas-spring arms with its LX line, Mounting Dream is a solid value pick on Amazon, and Sanus carries broad retail availability. The right call depends on your combined screen weight and your desk width.
Ergonomics for a primary plus secondary screen
Two screens rarely deserve equal attention, and setting them up as if they do strains your neck. Match the layout to how you work.
- Primary plus secondary (most common): put the screen you use most directly in front of you, top of the display at or just below eye level. Angle the second screen inward beside it for reference material, chat, or email.
- Symmetric split: if you genuinely split work evenly, center the gap between the two screens on your nose and angle both inward slightly so each faces you. This keeps the bezel seam from sitting where you stare.
- Mismatched sizes: raise the smaller screen so its top lines up with the larger one, which a height-adjustable arm makes easy. Two factory stands rarely allow this.
The single most important rule with two screens is that the panel you look at most should sit dead center, not off to the side where you twist toward it all day.
Will an electric riser handle two monitors?
Often the best answer for heavier setups. An electric dual monitor standing desk converter uses a motor and a button instead of a manual lift, which removes the effort of raising a deck loaded with two screens, an arm, and a keyboard. The motorized models also tend to carry higher weight ratings and add memory presets, useful when two people share the desk. The trade-off is price and shipping weight. The honest read: if your combined load is light and your budget is tight, a manual gas-spring riser is fine; if you are lifting 30 lbs of screens plus an arm several times a day, the motor earns its cost.
Measure the width first, then weigh the load
Start with a tape measure across the back of your desk and across both monitors, because total width is the number that disqualifies most single-screen risers from holding two. Once you know the deck will fit both panels with a clean gap, add up the weight, confirm the mount surface, and decide between a dual arm and bare stands. Center the load so the platform stays steady when raised, route both screens’ cables with slack for the full travel, and a two-screen riser turns a cramped two-screen desk into a setup you can switch from sitting to standing in seconds. Check the width and the weight rating before you order, and the upgrade takes one afternoon instead of a returned box.