
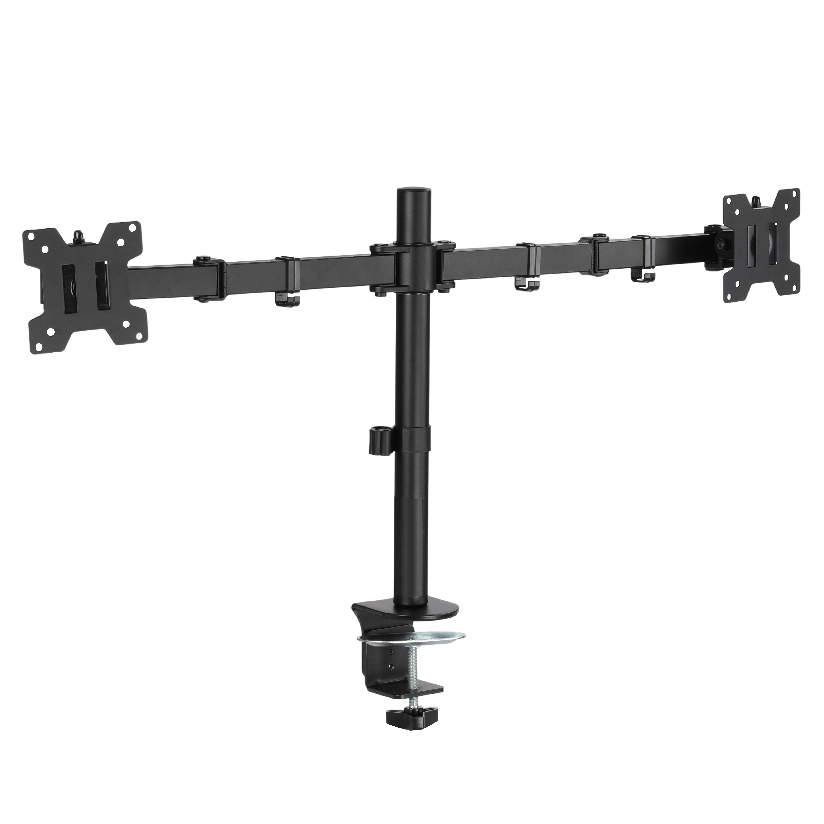
Your monitor sits on its factory stand, the base eats half your desk, and the screen never quite lands at the height your neck wants. A vesa mount monitor arm fixes all three by bolting the screen to a movable arm that clamps to the desk instead of resting on it. The phrase “VESA” on the box just means the back of your monitor has a standard square of threaded holes, and the arm uses those same holes. The hard part is not the standard itself but matching the arm to your screen weight, your desk thickness, and how much you actually move the display. This guide walks through what VESA means, the pattern sizes, and how to pick the arm that fits your setup.
What VESA actually means on the back of a monitor
VESA is a mounting standard set by the Video Electronics Standards Association. In practice it refers to the spacing between the four threaded holes on the rear of a monitor, measured in millimeters from center to center. A vesa mount monitor arm bolts into those holes, so the first thing to check before buying anything is whether your screen has them at all and what spacing they use.
The two patterns that cover almost every desktop monitor are 75x75mm and 100x100mm. Smaller and older displays often use 75×75, while most modern 24 to 32 inch monitors use 100×100. A 100×100 vesa monitor arm is the most common pick because it suits the majority of office and gaming screens sold today. Some larger or ultrawide panels skip VESA entirely or hide the holes behind a snap-off cover, and a few thin all-in-one designs offer no holes at all. If your monitor lacks a VESA pattern, a VESA adapter plate that grips the screen edges can add one, but confirm the screen weight stays inside the arm rating.
VESA pattern sizes and what fits them
Knowing your pattern size narrows the search in seconds. The table below lines up the common VESA sizes against the screens they typically suit and the weight you can expect at each tier.
| VESA pattern | Hole spacing | Typical screen size | Common weight range | Desk-clamp arm ready |
|---|---|---|---|---|
| 75×75 | 75mm x 75mm | 13 to 24 inch | 2 to 7 kg | Yes |
| 100×100 | 100mm x 100mm | 24 to 32 inch | 5 to 12 kg | Yes |
| 200×100 | 200mm x 100mm | 32 inch and up | 8 to 18 kg | Yes |
| 200×200 | 200mm x 200mm | large/ultrawide | 12 kg and up | No |
Most desk arms ship with screws for both 75×75 and 100×100 in the box, so a single arm often handles either. The number that limits you is weight, not the hole pattern, which is why every spec sheet lists a load range. Buy with margin: a monitor near the top of an arm’s rating will hold, but it leaves less room to add a webcam, light bar, or a second screen later.
Gas spring or mechanical: how the arm holds position
This is the choice that changes how the arm feels every day, so it is worth slowing down on. Both types support the screen, but they reposition very differently.
A gas spring vesa monitor arm uses a sealed gas piston that counterbalances the screen weight. You push the monitor up, down, forward, or back with one finger and it floats to the new spot and stays there. You set the tension once for your screen weight, and after that the arm moves freely. This is the better pick if you adjust the screen often, switch between sitting and standing, or share the desk with someone of a different height.
A mechanical arm uses fixed joints and a friction or spring tension you tighten with a hex key. It holds a chosen height firmly and costs less, but changing the position means loosening and re-tightening, so it suits a setup you dial in once and rarely touch. For a single screen that lives in one spot, a mechanical single monitor arm vesa mount is a sensible, lower-cost answer.
The practical split looks like this:
- Choose gas spring if you reposition daily, stand and sit, or want effortless one-hand movement.
- Choose mechanical if you set the screen once, want to spend less, and value a position that never drifts.
- Either works for a basic two-screen office where the monitors stay put most of the week.
Single, dual, and beyond
How many screens you run decides the arm body of your vesa mount monitor arm, not just the mount head.
- Single arm. A single monitor arm vesa mount clears the desk under one screen and gives you tilt, swivel, and height in a compact footprint. Best for one main display.
- Dual arm. A dual vesa monitor arm puts two screens on one base, either side by side or stacked. It saves a second clamp and keeps both screens aligned at the same height.
- Triple and quad. Stands that hold three or four screens exist for trading desks and content work, usually on a heavier base or a freestanding pole rather than a single clamp.
A dual vesa monitor arm asks more of your desk than a single one, because two screens load the clamp point harder. Check the combined weight against the rating and confirm the desk edge can take the clamp pressure without bowing.
Desk clamp or grommet: how the arm attaches
The arm has to grab your desk, and there are two ways it does that. A vesa monitor arm desk clamp pinches the rear edge of the desk between a top pad and a bottom plate, needing no holes drilled. It is the fast, reversible option and works on most desks between roughly 10mm and 85mm thick, so measure your desktop before ordering. The grommet option drops a bolt through an existing hole (or one you drill) in the desk surface and clamps from below, which gives a very firm hold and suits desks with a cable pass-through hole already there.
Most quality arms include both a clamp and a grommet kit in the same box, so you can decide at install time. The steps for a clean clamp install are short:
- Measure your desk thickness and confirm it falls inside the clamp’s range.
- Position the clamp near a solid part of the desk, not over a drawer gap or a thin overhang.
- Tighten the clamp until the base sits flush and does not rock.
- Bolt the VESA plate to the back of the monitor using the screws that match your pattern.
- Hang the screen on the arm, then set the gas-spring tension or the mechanical joints to your height.
Do these in order and the install is a fifteen-minute job with one hex key.
Where ThunderTech Pros fits for desk setups
ThunderTech Pros manufactures its mounting hardware in its own ISO 9001:2015 certified factories, with 17 years of production experience across TV mounts, monitor arms, and AV mounting solutions. For a desk arm that consistency matters in two specific places: the gas piston, which has to keep its counterbalance over years of daily movement, and the hole tolerances on the VESA plate, which keep a loaded screen from drifting downward.
For a desk where you move the screen a lot, the ThunderTech Pros QTH-1CW gas-spring arm covers 13 to 32 inch monitors, supports 5 to 20 kg, and ships with both a desk clamp and a grommet mount in the box. For a fixed two-screen office, the DA-2 mechanical dual arm holds up to 32 inch screens at 8 kg per arm and keeps a set height firmly. You can compare the current monitor arm range on the ThunderTech Pros product lineup before matching one to your screens. The brand carries TÜV and UL certification and supplies through Walmart, Costco, Amazon, and Lowe’s, so the hardware clears retail safety review.
To be fair, ThunderTech Pros is one option among several. Ergotron’s LX line is the long-standing gas-spring reference and is well made, usually at a higher price. Mounting Dream is a strong value pick on Amazon, and Sanus has wide retail reach. The right call depends on your screen weight, how often you move it, and your budget.
Matching the arm to your desk and screens
A few common setups make the decision quick.
- One 27 inch office screen, set once: a mechanical single monitor arm vesa mount with a 100×100 vesa monitor arm head is the cheapest tidy answer.
- Sit-stand desk, frequent height changes: a gas spring vesa monitor arm so the screen floats with one hand.
- Two screens at the same height: a dual vesa monitor arm on one clamp keeps both aligned and saves a base.
- No cable hole in the desk: use the vesa monitor arm desk clamp; no drilling needed.
- Heavy 32 inch or curved panel: check the weight against the rating with margin before you buy.
The deciding factors are screen weight and how much you move it. Confirm both, plus your VESA pattern and desk thickness, and the arm choice falls into place.
Set your screen at eye level and start there
Begin with the two numbers that gate everything: your monitor’s VESA pattern (75×75 or 100×100) and its weight. Those decide which arms even qualify. From there, pick gas spring if you adjust often or mechanical if you set it once, choose single or dual for your screen count, and confirm your desk thickness for a clamp. Get those right and a vesa mount monitor arm turns a crowded desk into open space with the screen exactly where your neck wants it. Measure the pattern and weight before you order, and the upgrade pays off the first hour you sit down.