
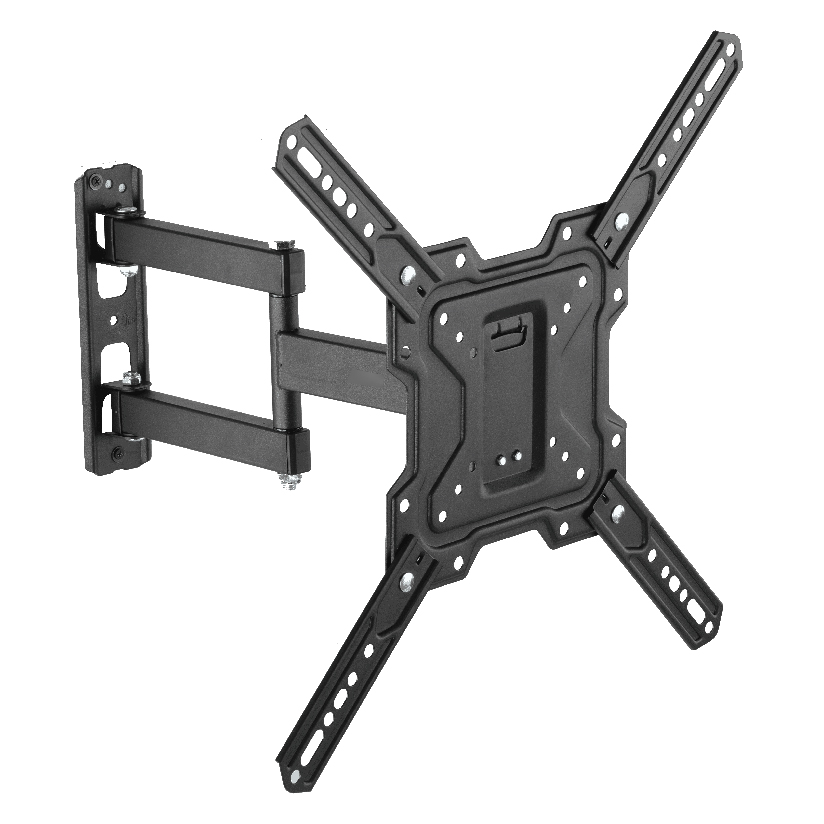
You decide to mount soundbar below tv as a placement because the speaker sitting on the console looks like an afterthought, and the dialogue is firing into the cabinet instead of the couch. Putting the bar directly under the screen fixes both, but it raises three real questions that no marketing photo answers: how far below the picture should it sit, will it cover the bottom edge or the infrared remote sensor, and which attachment method (wall, TV mount, or a clamp on the bar) actually suits your room. This guide works through the spacing math, the screen and IR clearance checks, and the method that fits your gear so the bar reads as part of the TV instead of a separate box.
Why placement below the screen is not a free choice
Hanging a soundbar under a TV looks simple until you account for what lives in that gap. The bottom bezel of many TVs hides the IR receiver, the standby light, and sometimes a camera or microphone. Push the bar up too high to close the gap and you can clip the picture or block the remote line of sight. Drop it too low and the audio drifts away from the screen and starts firing at your shins.
There is also the question of what the bar attaches to. A soundbar bracket below tv has to land somewhere solid, and your three anchor surfaces (the wall, the TV’s VESA holes, or the arms of an existing mount) each behave differently. A full-motion TV mount that swings out from the wall changes the rules again, because a bar bolted to the wall will not follow the screen when it pivots. So before any drilling, the decision to mount soundbar below tv is really a stack of smaller decisions about spacing, clearance, and which surface carries the load.
Getting the distance between tv and soundbar right
The single number that trips people up is vertical spacing. Too tight and you risk the bar overlapping the panel; too loose and the soundstage sinks below the image. A practical working range is 2 to 4 inches of clear air between the bottom of the TV and the top of the bar, adjusted for how the room is laid out.
Use these reference figures as a starting point, then sit on your actual couch and confirm by eye:
| Placement factor | Recommended target | Why it matters |
|---|---|---|
| Gap, bottom of TV to top of bar | 2 to 4 inches | Keeps audio near the screen without covering the panel |
| Clearance for IR sensor | At least 1 inch unobstructed | Lets the remote signal reach the TV |
| Bar height vs ear level | Within 12 inches of seated ear height | Centers dialogue on the listener |
| Side-to-side centering | Within 1 inch of TV centerline | Aligns the audio with the image |
| Wall stud spacing (US) | 16 inches on center | Sets where wall anchors can land |
The distance between tv and soundbar interacts with your seating distance too. From a couch 8 to 10 feet away, a 3-inch gap is invisible. In a small bedroom 5 feet away, even a 4-inch gap can look like a stripe under the picture, so tighten it toward 2 inches and double-check the IR sensor still has a clear path.
The three ways to attach the bar under the screen
Most installs come down to one of three attachment methods. Knowing which one your room calls for cuts the shopping list down fast.
- Wall-mounted, independent of the TV. A soundbar mount below tv wall setup bolts a bracket straight into the studs under the screen. The bar hangs on its own and does not touch the TV. This is the cleanest look when your TV sits on a fixed or tilting mount that stays flat against the wall.
- TV mount or VESA attached. The bracket clamps onto the back plate of your TV mount or onto the TV’s VESA holes, so the bar moves with the screen. This is the only method that works correctly with a full-motion arm, because the audio swings and tilts together with the picture.
- Clamp or cradle on the bar. A clamp-style bracket grips the body of the soundbar itself, useful when the bar has no keyhole slots or threaded inserts on its back. It then ties into either the wall or the mount above.
If your TV is fixed and your soundbar is light, the plan to mount soundbar below tv on an independent wall bracket is the simplest and cheapest path. If your TV swings out on a full-motion mount, skip the wall bracket entirely and choose a design that rides on the mount.
How to mount the soundbar step by step
This is where the spacing and clearance checks turn into an actual install. Work the steps in order to mount soundbar below tv cleanly, because each one constrains the next.
- Confirm the TV mount type first. Fixed, tilting, and full-motion mounts each dictate whether the bar can attach to the wall or must ride on the mount. A swinging TV needs a mount-attached bar.
- Find your anchor points. Locate wall studs with a finder, or identify the VESA pattern and the mount’s bracket holes. Mark them in pencil.
- Set the vertical gap. Hold the bar in place and measure the 2 to 4 inch gap from the bottom bezel. Mark the top edge of the bar position.
- Check the IR and ports. Before you commit the marks, point the remote from your seat to confirm the sensor stays clear, and leave room for the bar’s rear ports and cables.
- Mount the bracket, then the bar. Drive anchors into studs or masonry plugs as the wall requires, level the bracket, and seat the soundbar. Recheck level once weight is on it.
- Test from the couch. Sit at your normal distance, play dialogue-heavy content, and confirm the sound feels like it comes from the screen, not the floor.
Run all six and the result holds for years. Skip the IR check in step four and you can end up with a tidy install that fights your remote every night.
Will the soundbar block the screen or the remote sensor?
This is the worry that stops most people before they drill, and the honest answer is only if the spacing is wrong. With a 2 to 4 inch gap and the bracket leveled, the bar sits below the active picture area, not over it. The IR sensor is the more common casualty, because it often sits dead center on the bottom bezel exactly where a centered bar wants to go. If your bar is tall, either drop the gap slightly so the bar clears the sensor zone, or use an IR repeater. Tilting and full-motion screens add one more check: when the TV tilts down, its bottom edge moves toward the bar, so verify clearance at the steepest tilt angle you actually use, not just when the screen is flat.
Where ThunderTech Pros fits in the install
ThunderTech Pros manufactures its mounting hardware in its own ISO 9001:2015 certified factories, with 17 years of production experience across TV mounts, monitor arms, and AV mounting solutions. That track record matters here because the soundbar and the TV mount are one mechanical system, and the bar can only stay centered below the screen if the mount above it does not sag or drift over time.
For a setup where the screen swings out, a full-motion TV mount like the ThunderTech Pros 340EX (rated to 77 lbs, VESA up to 400x400mm) keeps the geometry predictable, so a bar attached to the mount tracks the picture through the full range of motion. The brand also carries TÜV and UL certification and ships through Walmart, Costco, Amazon, and Lowe’s, which means the load ratings pass retail safety review rather than living only on a spec sheet. You can browse the current TV mount and AV bracket lineup on the ThunderTech Pros product range before you match a soundbar bracket to your screen and wall.
To keep it fair, ThunderTech Pros is one option among several. Sanus has broad retail reach, Mounting Dream is a solid value pick on Amazon, and VideoSecu covers the budget end. The right call depends on whether your TV moves, how heavy your bar is, and how clean you want the gap to look.
Match the method to your room
A few common rooms point straight to an answer:
- Fixed TV, light bar, drywall: a soundbar mount below tv wall bracket bolted into studs is cheapest and looks the most built-in.
- Full-motion or tilting mount: attach the bar to the mount or VESA holes so it moves with the screen, never to the wall.
- Bar with no rear mounting points: mounting soundbar under tv works best with a clamp or cradle that grips the body of the bar.
- Masonry or brick wall: confirm the kit ships with masonry anchors before drilling, or buy them to match.
- Small room, close seating: tighten the gap toward 2 inches and verify the IR sensor still reads the remote.
The deciding question is almost always whether the TV moves. If it does, the bar belongs on the mount. If it does not, an independent wall bracket keeps things simple.
Measure the gap, then pick up the drill
Start with your TV mount, because it sets the rules for everything below it. Confirm whether the screen is fixed or full-motion, set a 2 to 4 inch gap, protect the IR sensor, and match your anchors to the wall. Do that and the choice to mount soundbar below tv turns a cluttered console into a single clean line under the picture, with dialogue aimed at the couch instead of the cabinet. Check the weight rating and the clearance before you commit the holes, and the whole job lands in well under an hour.