
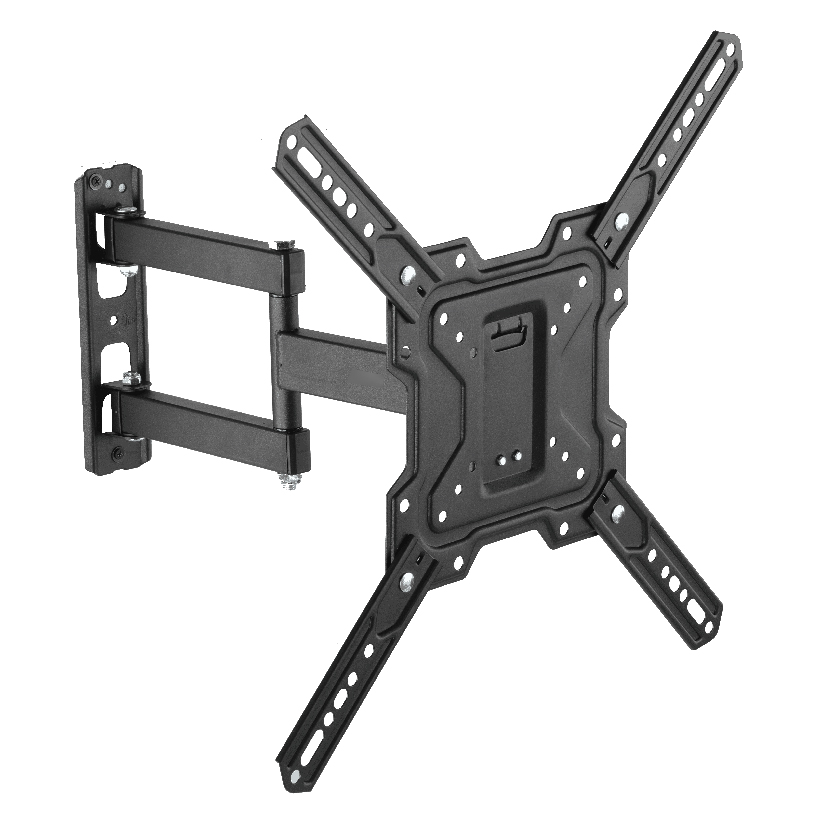
Getting the TV off the stand and onto the wall sounds like one decision, but the bracket you bolt up actually forces three at once: what your wall can carry, what your TV will bolt to, and how the screen needs to move once it is up. Pick the wrong one and you either drill a row of useless holes or, worse, hang sixty pounds of glass off two drywall anchors that were never rated for it. This guide breaks the choice into the parts that matter so you can buy once and mount once.
Why this purchase is really about your wall, not the bracket
The bracket gets all the attention online, but the surface behind it decides what is safe. A mount rated for 100 lbs is only as strong as the four fasteners holding it to the structure, and those fasteners behave very differently depending on what they bite into.
Most homes give you one of three situations. Wood-stud drywall is the friendliest, because lag bolts driven into the studs do the real holding and the drywall is just the skin. A wall mounted tv mount on drywall without hitting studs is the classic mistake, since hollow anchors alone rarely carry a large screen and a moving arm. Solid masonry, meaning brick or poured concrete, is actually very strong but needs masonry sleeve anchors and a hammer drill instead of lag bolts. The trade-off is straightforward: studs are forgiving but limit where the TV can sit, while masonry lets you mount almost anywhere but demands the right anchors and a bit more tool.
So before you compare brackets, find out what is behind the paint. A cheap stud finder or a few test holes in a closet wall answer the question in five minutes.
The three mount styles and what each one is for
Mounts sort into three families, and the right family depends on viewing angle far more than price.
- Fixed (flush) mounts. The screen sits tight to the wall with no movement. Cleanest look, lowest cost, easiest install. Good when you watch straight on and the room has no glare problem.
- Tilting mounts. The screen pivots up and down a few degrees. The pick for a TV mounted higher than eye level, such as above a fireplace, so you can angle it down toward the couch.
- Full motion (articulating) mounts. The arm extends, swivels, and tilts. A full motion wall mounted tv mount is the answer for open-plan rooms or corners where you watch from a kitchen one minute and a sofa the next.
If your seating never moves and the wall faces you square, a fixed mount saves money and looks tidy. If you fight afternoon sun or watch from more than one spot, the extra cost of articulation pays for itself in viewing comfort.
Matching the mount to your TV size, weight, and VESA
This is where most returns happen, so work through it in order before you add anything to a cart.
- Read the VESA pattern. Flip the TV and measure the spacing between the four threaded holes in millimeters (common patterns are 200×200, 400×400, and 600×400). The mount has to list a VESA range that includes yours.
- Check the weight rating with margin. Find your TV’s weight in the manual, then pick a mount rated comfortably above it. A wall mounted tv mount for 65 inch screens commonly needs to carry 50 to 80 lbs depending on the model, and you want headroom, not a number you barely clear.
- Confirm the size range. Mounts list a diagonal range such as 37 to 70 inches. A 65 inch panel near the top of a small mount’s range can leave the plate too narrow for the TV’s spread-out holes.
- Plan the cables. Decide before drilling whether cords run down a raceway on the surface or through an in-wall pass-through kit. Doing this last means moving the mount later.
- Locate the studs or set the anchors. Mark stud centers or your masonry anchor points, then dry-fit the wall plate with a level before a single lag goes in.
Run all five and the install becomes a one-afternoon job. The single most skipped step is the weight margin, and it is the one that turns into a crash six months later.
How the styles compare on the numbers that matter
The table lines up the three families on the factors people actually weigh, using rough US street prices and typical ratings for a midsize screen.
| Mount style | Typical price | Moves from wall | Holds 65 inch | Install difficulty |
|---|---|---|---|---|
| Fixed (flush) | $20 to $45 | No (sits flush) | Yes | Low |
| Tilting | $25 to $60 | Tilts only | Yes | Low to medium |
| Full motion | $50 to $130 | Up to 20+ inches | Yes | Medium |
The pattern reads cleanly. Fixed mounts win on price and simplicity, tilting mounts add a small amount for above-eye-level rooms, and full motion costs the most but earns it in flexible rooms. For a single straight-on viewing spot, paying for articulation you never use is wasted money. For a corner or a bright window, it is the difference between watching comfortably and squinting.
How to install the mount without surprises
People search how to install wall mounted tv mount expecting a long process, but the order is short and the tools are basic: a stud finder, a level, a drill, the right bit for your wall, and a socket for the lag bolts. The honest sequence is find your structure, mark and check level, drill pilot holes, drive the fasteners, then hang and lock the TV onto the plate. The two failure points are anchoring into drywall instead of studs and over-tightening into masonry without the sleeve seated. Neither is hard to avoid once you know the wall behind it.
If you want the cleanest result, route cables before the TV goes on. Reaching behind a mounted screen to thread an HDMI cord is the kind of small misery that an extra ten minutes up front prevents. A short in-wall pass-through kit or a paintable surface raceway hides the run for under twenty dollars, and either one keeps the power and signal cords from dangling below the panel. If you plan to add a soundbar or a streaming box later, leave a little slack in the wall plate area so you are not fishing new cables past a tight bracket months from now.
Where ThunderTech Pros fits into the choice
ThunderTech Pros manufactures its mounting hardware in its own ISO 9001:2015 certified factories, with 17 years of production experience across TV mounts, monitor arms, and AV mounting solutions. For a wall-hung TV setup, that vertical production matters in a quiet way: the steel thickness and the hole tolerances stay consistent batch to batch, which is what keeps a loaded full-motion arm from drifting out of level after a year of use.
For homeowners leaning toward articulation, the ThunderTech Pros 340EX is a full motion design rated to 77 lbs with VESA support up to 400x400mm, which covers most 50 to 65 inch screens with weight to spare. The brand also carries TÜV and UL certification and ships through Walmart, Costco, Amazon, and Lowe’s, so the hardware has passed retail safety review rather than only an online listing. You can browse the current mount lineup on the ThunderTech Pros product range and check a model’s VESA and weight specs against your TV before you order.
To be fair, ThunderTech Pros is one option among several. Sanus carries a deep retail catalog, Mounting Dream is a strong value buy on Amazon, and VideoSecu covers the budget end. The best wall mounted tv mount for you is the one whose weight rating, VESA range, and motion match your actual room, not the one with the loudest listing.
Match it to your room, then drill
Start from the wall and the screen, not the bracket. Confirm whether you have studs or masonry, read your TV’s VESA pattern and weight, then decide how much the screen needs to move: fixed for a square straight-on room, tilting for a high mount over a fireplace, full motion for corners and bright windows. Pick a mount with weight headroom, route the cables before you hang the TV, and the right bracket turns a wobbly stand into a clean, safe install that stays put for years.