
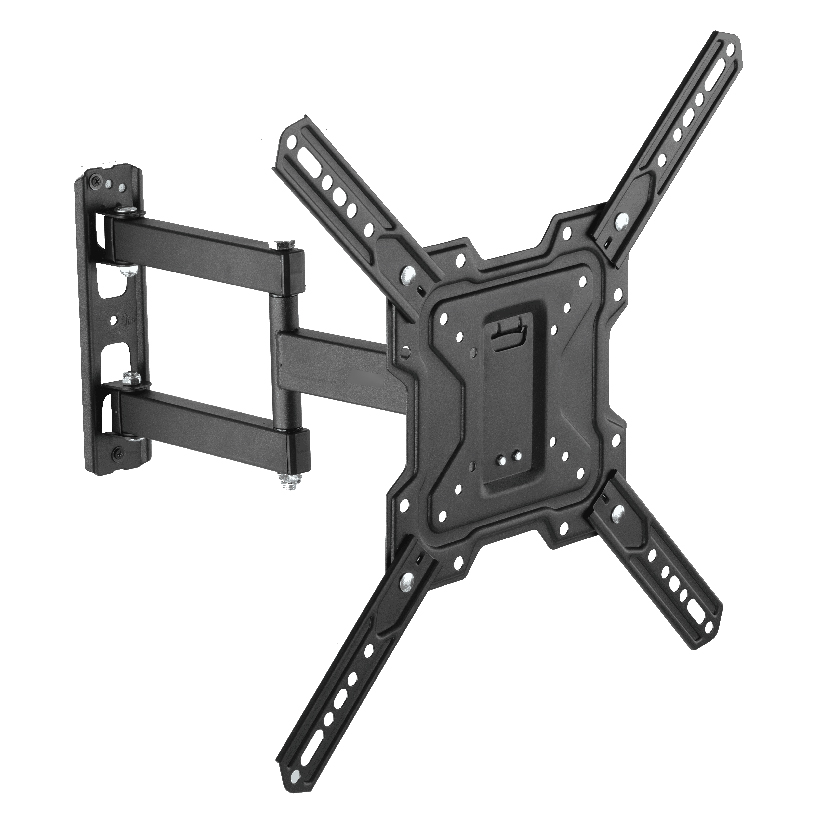
A 65-inch screen is the size where a lot of homeowners stop trusting whatever bracket is cheapest and start reading spec sheets. The panel is big enough that a wrong choice sags, pulls at the drywall, or sits at the wrong height for the couch. Choosing a 65 tv wall mount bracket really comes down to four numbers: how much your TV weighs, what VESA pattern it uses, how far apart your wall studs sit, and how high you want the screen. Get those four right and the install is straightforward. Miss one and you are patching holes. This guide walks through each of those four numbers from a homeowner’s point of view.
Why a 65-inch screen changes the math
A 55-inch TV forgives a lot. A 65-inch panel is wider, heavier, and pulls harder on the wall, so small mistakes show up faster. Most 65-inch TVs land between 45 and 70 lbs, but an articulating arm extended a foot off the wall multiplies that load through a longer lever, which is why the bracket’s rated capacity should sit well above the bare panel weight.
The wider chassis also matters for stud spacing. Interior walls in the US are usually framed with studs 16 inches on-center, occasionally 24. A 65-inch TV is roughly 57 inches wide, so its mounting plate can comfortably span two studs and sometimes three. That gives you a real choice about single-stud versus double-stud fixing, and on a panel this size, double-stud is the safer default. A good bracket ships with a horizontal rail long enough to catch two studs at standard spacing.
The four numbers to lock down before you buy
Work through these in order before you add anything to a cart.
- Panel weight with margin. Find your TV’s weight without the stand, then look for a bracket rated at least 1.3 times that figure. A 60 lb TV pairs comfortably with a mount rated to 80 lbs or more. Checking the 65 tv wall mount bracket weight limit against your actual panel is the single most skipped step, and the one that prevents a slow sag.
- VESA hole pattern. Flip the TV face-down on a blanket and measure the spacing between the four threaded holes on the back, horizontal by vertical, in millimeters. Most 65-inch sets use 400x400mm, and some run 600x400mm. The bracket has to list your exact pattern.
- Stud spacing and wall type. Use a stud finder to confirm whether your studs are 16 or 24 inches on-center, and whether you are anchoring into wood framing, concrete, or brick. Each surface needs its own hardware.
- Viewing height and distance. Sit on your couch and note eye level. For a 65-inch screen, a viewing distance of roughly 8 to 10.5 feet is comfortable, and the center of the panel should land close to seated eye level, often 42 to 48 inches from the floor for the screen center.
Settle these four and the rest of the decision is about how much the screen needs to move.
Fixed, tilting, or full motion on a big panel
The three mount styles trade adjustability against cost, depth, and load on the wall. On a 65-inch TV the differences feel larger than they do on a small screen.
- Fixed (low profile). Holds the panel flat and close to the wall, usually under 1.5 inches of gap. Cheapest and strongest for the weight, but no angle adjustment. Best when the TV sits at eye level and faces the seating straight on.
- Tilting. Adds 5 to 15 degrees of downward tilt to cut glare and aim a high-mounted screen down at the couch. A tilting 65 tv wall mount bracket is the common pick for sets placed above a fireplace or higher than eye level, since tilt fixes the bad downward viewing angle without much added depth.
- Full motion. Swings out, rotates, and tilts on an articulating arm. The most flexible and the most demanding on both the wall and the bracket, because an extended arm puts the full panel weight on a long lever. A 65 inch tv wall mount bracket full motion design is worth the extra cost in open rooms, corner installs, or where you watch from more than one spot.
If your wall and viewing angle are simple, a fixed or tilting mount is lighter on the budget and the studs. If the room is open or the screen needs to serve a kitchen and a couch, the articulating arm earns its keep.
How the styles compare on the numbers that matter
The table below lines up the three styles on the specs that drive a 65-inch decision. “Wall depth” is the gap between wall and panel at rest, and “studs needed” reflects the safer fixing for a screen this size.
| Mount style | Typical price | Wall depth | Tilt / swivel | Studs needed | Rated load you want |
|---|---|---|---|---|---|
| Fixed low profile | $25 to $50 | Under 1.5 in | None | 2 studs | 80 lbs or more |
| Tilting | $35 to $70 | 1.5 to 3 in | Tilt only | 2 studs | 80 lbs or more |
| Full motion | $70 to $160 | 2 to 3 in folded, extends 16 to 22 in | Tilt and swivel | 2 studs (lag bolts) | 90 lbs or more |
The pattern is clear. A fixed mount gives the most strength per dollar and the slimmest profile. Full motion costs more and asks more of the wall, but it is the only one that lets a 65-inch screen serve several seating positions in one room.
Reading wall strength before you trust it
On a panel this large, the wall is as important as the bracket. A double-stud fixing into solid 2×4 framing with lag bolts is the gold standard, and it is why a wider mounting rail matters so much. If you only have a single stud where you want the TV, an articulating arm is risky, and you should either shift the position to catch two studs or move to a fixed mount that distributes load. For concrete or brick, use the masonry anchors the bracket specifies rather than generic plugs. Hollow drywall with no stud behind it will not hold a 65-inch TV on any bracket, full stop, so confirm framing before you commit to a spot.
Where ThunderTech Pros fits for a 65-inch screen
ThunderTech Pros manufactures its mounting hardware in its own ISO 9001:2015 certified factories, with 17 years of production experience across TV mounts, monitor arms, and AV mounting solutions. For a heavy 65-inch panel, that consistency in steel grade and hole tolerance is what keeps a loaded arm from creeping over months of use, which is the difference you cannot see on a product photo.
For an open living room where the screen needs to swing toward more than one seat, a full-motion design like the ThunderTech Pros 340EX (VESA up to 400x400mm, rated to 77 lbs) handles a typical 65-inch set with margin to spare on the lighter end of the weight range, while heavier panels point you toward the higher-rated full-motion models in the lineup. The brand also carries TÜV and UL certification and ships through Walmart, Costco, Amazon, and Lowe’s, so the hardware clears retail safety review. You can compare the fixed, tilting, and articulating options on the ThunderTech Pros mount lineup before matching one to your panel weight.
To keep this honest, ThunderTech Pros is one option among several. Sanus has wide retail reach and a deep catalog, Mounting Dream is a strong value buy on Amazon, and VideoSecu covers the budget end. The best 65 tv wall mount bracket for your room depends on your TV’s weight, your VESA pattern, and how much the screen needs to move.
Putting the install together
A clean job follows a predictable order, and on a 65-inch TV it is worth doing slowly.
- Mark the studs first with a finder, then confirm by drilling a small pilot hole into the center of each.
- Set the height so the screen center lands near seated eye level, measuring from the floor before you drill.
- Use the bracket’s own bolts into the VESA holes, never longer ones, since a too-long screw can crack the panel internals.
- Lag-bolt the wall plate into both studs and check it for level before hanging the TV.
- Get a second person to lift a 65-inch panel onto the arm; this is not a solo step.
If you want a fuller walkthrough on how to install 65 tv wall mount bracket setups, the bracket’s own instructions plus a stud finder and a level cover the whole job in well under an hour for a fixed or tilting mount, and a bit longer for full motion.
Match the bracket to your wall and your couch
Start with the panel weight and the VESA pattern, because those rule out the wrong brackets immediately. Then look at your studs: two studs at 16 inches on-center open up any style, while a single stud pushes you toward a fixed mount or a relocation. Finally let the room decide the motion. A screen that faces one couch is happy on a fixed or tilting mount, and an open-plan space that you watch from the kitchen and the sofa is worth the cost of an articulating arm. Confirm the weight rating, the hole pattern, and the framing before you drill, and a big screen turns from a nervous lift into a tidy, level fixture that holds for years.